Table of Contents
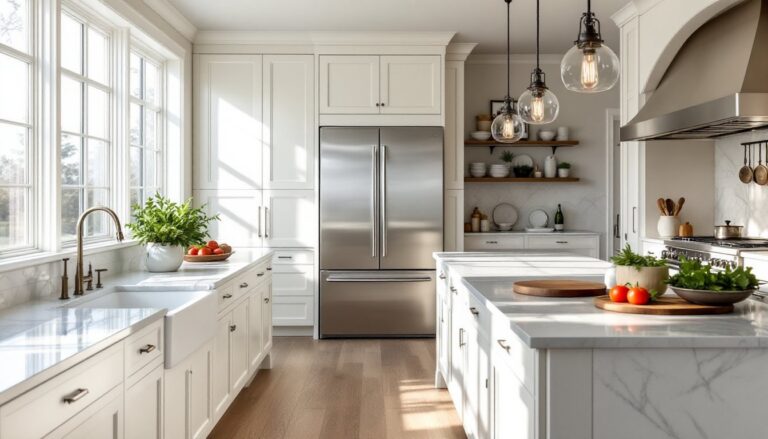
ToggleA black bathroom vanity isn’t just a trend, it’s a statement piece that anchors a bathroom with sophistication and visual weight. Whether you’re planning a full remodel or a quick upgrade, swapping in a black vanity can shift the entire mood of the space, from dated builder-grade to modern black vanity bathroom styling that feels deliberate and polished. The trick is getting the sizing, finish, and installation right. A black vanity bathroom done well is bold without being heavy, contemporary without feeling cold. This guide walks through selection, styling, and installation so homeowners can confidently tackle this upgrade themselves.
Key Takeaways
- A black bathroom vanity creates high contrast and serves as a sophisticated focal point, instantly upgrading a bathroom from outdated to modern while hiding water spots and soap residue better than light finishes.
- Proper sizing is essential: measure your bathroom layout, account for door clearance and fixture placement, and choose between wall-mounted vanities for visual space-saving or freestanding units for easier installation.
- Black vanity bathrooms require adequate task lighting (sconces flanking mirrors) and lighter countertops or backsplashes to prevent the space from feeling cramped, as black absorbs light.
- Select durable materials like solid wood with multi-coat lacquer finishes, moisture-resistant MDF with proper sealing, or powder-coated metal for longevity; pair with light marble or quartz countertops and one or two coordinated metal hardware finishes for cohesive design.
- DIY installation of freestanding black vanities takes 2–4 hours for moderately handy homeowners, but wall-mounted units require stud location and potential blocking; always prioritize leveling and use compression fittings for plumbing connections.
- Maintain your black bathroom vanity with daily damp microfiber cloth wiping and weekly pH-neutral cleaning, avoid abrasives and ammonia cleaners, run exhaust fans for humidity control, and use touch-up paint pens for minor damage preservation.
Why Black Bathroom Vanities Are a Design Game-Changer
Black vanities create high contrast in spaces dominated by white tile, light grout, and chrome fixtures. That contrast immediately draws the eye and gives a bathroom a focal point, something most powder rooms and master baths lack. Unlike wood tones that read warm or gray cabinetry that fades into the background, black vanities pop without requiring bright colors or busy patterns.
From a practical standpoint, black hides minor water spots and soap residue better than white or light finishes, especially in matte or satin sheens. It’s also forgiving during touch-ups: a matte black paint pen can fix small dings without the color-matching headaches of stained wood.
Black works across styles, industrial with open plumbing and concrete, traditional with raised panels and brass hardware, or minimalist with flat-front cabinetry and integrated pulls. That versatility makes it easier to evolve the rest of the bathroom over time without the vanity feeling locked into a single aesthetic. Designers on platforms like Houzz consistently rank black cabinetry as one of the most adaptable choices for both resale appeal and personal taste.
One caution: black absorbs light. In a windowless or poorly lit bathroom, a large black vanity can make the space feel smaller. Plan for adequate task lighting (sconces flanking the mirror, not just overhead cans) and consider lighter countertops or backsplashes to bounce light around.
Choosing the Right Black Vanity for Your Bathroom Size and Layout
Measure twice, order once. Standard vanity depths run 21 inches (for tight spaces) or 24 inches (most common). Widths vary widely: 24 inches for powder rooms, 30–36 inches for guest baths, 48–60 inches for primary baths, and 72 inches or more for double-sink setups.
Before shopping, map out your bathroom’s footprint. Check door swing clearance, most building codes (per IRC) require at least 21 inches of clear space in front of fixtures. Measure from the wall to the closest toilet flange or tub edge. If your vanity extends past the toilet centerline, you’ll block access or create an awkward squeeze.
Wall-mounted (floating) black vanities save floor space visually and literally, great for small or modern black vanity bathroom layouts. They expose the floor, making the room feel larger, and simplify cleaning underneath. Drawback: installation requires hitting studs or adding blocking between studs, and you’ll see the plumbing unless you box it in or use a concealed trap.
Freestanding vanities (legs or a toe-kick base) are easier to install and move. They don’t require as much structural prep, and most come with pre-drilled holes for standard 4-inch or 8-inch centerset faucets or single-hole mounts. Downside: they take up more visual space and collect dust underneath.
Single vs. Double Black Vanities
Single-sink vanities (24–48 inches wide) suit most bathrooms and offer more counter space per person than you’d expect. A 36-inch single gives two people room for toothbrushes, skincare, and a tray without crowding. If you’re tight on space, this is the smarter call.
Double-sink vanities (60–84 inches) need width and plumbing for two drain lines. Each sink typically gets 30–36 inches of width. They’re overkill in a bathroom under 60 square feet unless the layout is long and narrow. Double vanities also mean double the P-traps, double the shut-off valves, and twice the faucet cost. Budget accordingly.
If your bathroom is under 50 square feet, stick with a single. If it’s a shared primary bath over 80 square feet, a double makes morning routines smoother. Between those sizes, consider how you actually use the space, most couples don’t need two sinks running simultaneously.
Top Materials and Finishes for Black Bathroom Vanities
Solid wood (maple, oak, birch) with a black painted or stained finish is durable and repairable. It holds up to humidity if properly sealed, but cheap paint jobs will chip. Look for multi-coat conversion varnish or lacquer finishes, these are factory-applied, hard-cured, and far tougher than brush-on paint. Solid wood vanities run $600–$2,000+ depending on size and joinery quality.
MDF (medium-density fiberboard) is common in budget and mid-range vanities. It takes paint beautifully and resists warping better than solid wood in damp environments, if it’s sealed. Exposed MDF edges or unsealed backs will swell and delaminate. MDF vanities range $300–$1,200. They’re fine for guest baths and powder rooms with good ventilation.
Plywood construction (often combined with MDF doors) offers a good middle ground: lighter than solid wood, more moisture-resistant than particleboard, and sturdy enough for wall-mounting. Edges should be banded or painted.
Metal vanities (steel or aluminum with powder-coated black finish) are increasingly common in industrial and modern designs. They’re impervious to water damage and lightweight, but dent more easily than wood. Powder coating is durable, but chips expose bare metal that can rust in humid bathrooms.
For finish sheen, matte or satin black hides fingerprints, water spots, and minor scratches better than gloss. High-gloss black looks striking in photos but shows every smudge and requires constant wiping. Satin strikes a good balance, subtle sheen, easy maintenance. Many featured bathroom galleries on Remodelista favor satin or flat black for exactly this reason.
Styling Your Black Vanity: Countertops, Hardware, and Accent Ideas
Countertop pairings: White or light marble (Carrara, Calacatta) is the classic move, high contrast, clean, and bright. Quartz in white, cream, or soft gray is more forgiving and non-porous (no sealing required). Coverage is roughly 15 square feet for a 60-inch vanity top, so budget around $40–$80 per square foot installed for quartz, $50–$150+ for natural stone.
Wood countertops (butcher block, live edge) warm up a black vanity bathroom and add texture, but require regular oiling and aren’t ideal near sinks unless treated with marine-grade sealer. Concrete or terrazzo counters pair well with industrial or eclectic styles.
For a bolder look, try black granite, soapstone, or black quartz, monochromatic, sleek, and dramatic. This works best in bathrooms with plenty of natural light or white tile to offset the darkness.
Hardware: Matte black handles and knobs create a tonal look: brushed brass, aged brass, or unlacquered brass add warmth and contrast. Polished chrome or nickel keeps it crisp and modern. Avoid mixing more than two metal finishes in one bathroom (faucet, hardware, light fixtures, towel bars).
Pull styles matter: bar pulls (3–5 inches) suit modern or transitional designs, cup pulls lean traditional, and knobs work on smaller doors or drawers. Match your faucet finish to hardware for a cohesive look.
Accent ideas: Pair a black vanity with white subway tile, hexagon floor tile, or large-format porcelain. Add a wood-framed mirror, woven baskets, or greenery to soften the contrast. Brass or gold sconces flanking the mirror warm the palette. If you want inspiration, browse HGTV bathroom galleries, many feature black vanity bathrooms balanced with natural textures and warm metals.
Installation Tips and Considerations for DIY Homeowners
Before you start: Turn off water at the main or at the fixture shut-offs. Disconnect the old vanity’s supply lines and P-trap. Have a bucket and towels ready, there’s always residual water.
Most freestanding vanities install in 2–4 hours for a moderately handy DIYer. Wall-mounted units take longer and require locating studs with a stud finder. If studs don’t line up with the vanity’s mounting bracket, you’ll need to install blocking, a horizontal 2×6 or 2×8 secured between studs. This may require opening drywall. Not comfortable with that? Hire a handyman or carpenter.
Leveling is non-negotiable. Use a 4-foot level on the vanity top, front-to-back and side-to-side. Shim under the base or adjustable feet until it’s dead-on. An unlevel vanity causes doors to swing open, drawers to slide, and water to pool.
Plumbing hookup: Most vanities use 1/2-inch compression fittings for hot and cold supply lines and a 1-1/4 or 1-1/2-inch P-trap for the drain. Flexible braided supply lines are easier than rigid copper. Hand-tighten, then a quarter-turn with a wrench, don’t overtighten or you’ll crack the ferrule.
If the new vanity’s drain location doesn’t match the old stub-out, you may need an offset P-trap or tailpiece extension. These are available at any hardware store and require no special tools, just a slip-joint pliers.
Faucet installation: Most faucets install before the vanity top goes on. Feed supply lines and the drain tailpiece through the pre-drilled holes, secure the faucet from below with mounting nuts (usually plastic or brass), then set the top and connect plumbing. Use plumber’s putty or silicone under the faucet base if it’s not gasketed.
Safety notes: Wear safety glasses when cutting or drilling. If using a reciprocating saw to remove an old vanity, watch for hidden plumbing or electrical. If the vanity has integrated lighting or outlets, turn off the circuit breaker and verify it’s dead with a non-contact voltage tester. Electrical work inside vanities usually requires a permit and should be handled by a licensed electrician if you’re not comfortable with NEC (National Electrical Code) requirements for GFCI protection in bathrooms.
Maintaining and Cleaning Your Black Bathroom Vanity
Daily: Wipe down with a damp microfiber cloth to remove toothpaste, soap, and water spots. Matte and satin finishes hide streaks: gloss shows everything.
Weekly: Use a pH-neutral cleaner, dish soap diluted in water works. Avoid ammonia-based glass cleaners or harsh alkaline degreasers: they can dull or strip painted and lacquered finishes over time. For stubborn grime, a drop of Murphy’s Oil Soap on a damp cloth is safe for most finishes.
Avoid abrasives: No scouring pads, baking soda pastes, or Magic Erasers on black cabinetry. These micro-scratch the surface and leave dull spots, especially on gloss finishes.
Touch-ups: Keep a matte black paint pen or small jar of touch-up paint (if provided by the manufacturer) for dings and chips. Clean the area, let it dry, apply a thin coat, and let cure for 24 hours.
Humidity control: Run the exhaust fan during and after showers (at least 20 minutes post-shower). Excess moisture can lift paint, swell MDF, and warp solid wood. If your bathroom doesn’t have a fan, crack a window or install one, most local codes (IRC) require mechanical ventilation in bathrooms without operable windows.
Hardware care: Wipe knobs and pulls regularly. Brass and oil-rubbed bronze develop a patina over time (that’s normal). If you want to preserve the original finish, apply a thin coat of Renaissance Wax every few months. Chrome and stainless need only soap and water.
For countertops, follow material-specific care: seal natural stone annually, avoid acidic cleaners on marble, and use trivets or mats under hot tools to prevent scorch marks on wood or laminate.