Table of Contents
ToggleInstalling a wired security camera system might sound like something that requires a professional crew and a hefty invoice, but many homeowners are tackling this project themselves, and doing it successfully. Unlike wireless cameras that depend on batteries and Wi-Fi signals that can drop mid-stream, a hardwired security camera system delivers reliable, round-the-clock surveillance with minimal downtime. If you’re ready to stop relying on spotty connectivity and want a robust setup that works when you need it most, this guide walks through everything from component selection to cable routing, with honest talk about what’s DIY-friendly and what might require backup.
Key Takeaways
- A wired security camera system delivers reliable 24/7 surveillance without battery or Wi-Fi dependency, using physical cables to connect cameras to a central DVR or NVR recorder.
- Hardwired systems provide superior video quality, stronger security against hacking, and longevity—quality cable lasts 15+ years and allows future camera upgrades without re-running cable.
- DIY installation of a wired security camera system is a manageable weekend project that involves planning camera placement, running cables through walls or attics, mounting cameras 7-9 feet high, and terminating connections with proper testing.
- When selecting a wired security camera system, prioritize at least 1080p resolution for facial identification, IP66 weatherproofing for outdoor cameras, motion detection with adjustable sensitivity, and expandable storage for 24/7 recording.
- Power over Ethernet (PoE) systems simplify installation by running a single cable for both data and power to each camera, eliminating the need for separate power cables.
- Buying a complete kit with cameras, recorder, cables, and power supply ensures compatibility and often costs less than assembling components individually.
What Is a Wired Security Camera System and How Does It Work?
A wired security camera system uses physical cables to connect each camera to a central recording device, typically a digital video recorder (DVR) or network video recorder (NVR). These systems rely on coaxial or Ethernet cables to transmit both video signals and, in many cases, electrical power.
Most hardwired security camera systems operate on one of two standards: analog over coaxial or IP (Internet Protocol) over Ethernet. Analog systems use coaxial cable (similar to old TV cable) and connect to a DVR that converts analog signals into digital recordings. IP-based systems use Cat5e or Cat6 Ethernet cable and connect to an NVR, which stores high-definition digital video.
Power delivery varies by setup. Traditional analog cameras require separate power cables running to each unit, while many IP cameras use Power over Ethernet (PoE), which supplies both data and power through a single Ethernet cable. This simplifies installation significantly, you’re running one cable instead of two.
The central recorder stores footage on an internal hard drive (commonly 1TB to 4TB for residential setups) and connects to your home network, enabling wired security camera system with remote viewing through a smartphone app or web interface. As long as your recorder is online, you can check live feeds or review archived footage from anywhere.
Key Benefits of Choosing Wired Over Wireless Security Cameras
The main advantage of a hardwired setup is reliability. There’s no battery to die at 2 a.m., no Wi-Fi dead zones that cut your camera offline, and no bandwidth congestion when multiple devices compete for signal. Your wired security camera streams continuously as long as it has power and a cable connection.
Video quality is another win. According to recent smart home device reviews, wired systems consistently deliver higher resolution and more stable frame rates than wireless competitors, especially in multi-camera setups. A wired outdoor security camera system can handle 4K feeds across eight channels without stuttering, whereas wireless systems often compress video to conserve bandwidth.
Security is tighter, too. Hardwired cameras can’t be jammed with RF interference or hacked through weak Wi-Fi passwords. An intruder would need physical access to your recorder or cables to disable the system, a much taller order than blocking a wireless signal.
Finally, there’s scalability and longevity. Quality coaxial or Ethernet cable can last 15+ years if properly installed. As camera technology improves, you can often upgrade individual cameras or the recorder without re-running cable, as long as you’ve spec’d the right cable type initially (Cat6 gives more future-proofing than Cat5e for IP systems).
The trade-off? Installation effort. You’ll be drilling, fishing cables through walls or attics, and possibly patching drywall. But for a permanent, no-fuss security solution, the upfront labor pays off.
Essential Components You’ll Need for Your System
Here’s what goes into a complete wired security camera system:
Cameras: Choose between bullet-style (cylindrical, good for targeted outdoor coverage) or dome-style (low-profile, harder to tamper with). For outdoor use, look for an IP66 or IP67 rating to handle rain and dust. Count on roughly one camera per entrance, driveway, or high-value area.
DVR or NVR: This is the brain of the system. DVRs pair with analog cameras: NVRs work with IP cameras. Size your storage based on camera count, resolution, and retention needs. A 4-channel 1080p system recording 24/7 typically needs 1TB for about three weeks of footage. Add more channels or higher resolution, and you’ll want 2TB or more.
Cabling: For analog systems, use RG59 coaxial cable (often sold in pre-made runs with BNC connectors). For IP systems, run Cat5e or Cat6 Ethernet cable. Cat6 is worth the small upcharge if you plan to upgrade cameras later. Budget roughly 100-150 feet per camera for interior routing, more if you’re running from a basement recorder to second-floor exterior mounts.
Power supply: Analog cameras need a 12V DC power supply at each location or a centralized multi-camera power box. PoE systems require a PoE switch or PoE-enabled NVR to power cameras through the Ethernet cable.
Monitor or display: Most recorders output HDMI or VGA, so any monitor works. You’ll use this for initial setup and occasional spot-checks, though most viewing happens via smartphone app after configuration.
Connectors and tools: BNC connectors and a crimping tool for coaxial, or RJ45 connectors and a crimping tool for Ethernet. If you’re buying bulk cable (cheaper and more flexible than pre-made runs), you’ll terminate connectors yourself.
Step-by-Step Installation Guide for DIY Homeowners
Installing a best wired security camera system is a weekend project for most homeowners, assuming straightforward routing and no major obstructions. Here’s the process.
Planning Your Camera Placement
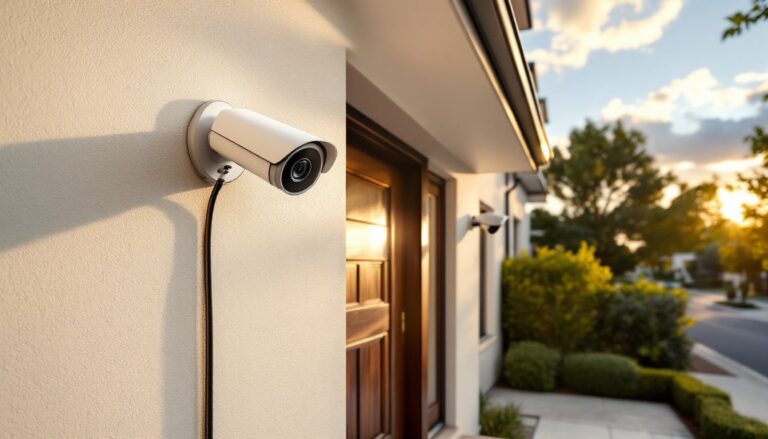
Start with a site survey. Walk your property and identify vulnerable entry points: front door, back door, side gates, garage, ground-floor windows. Mark potential camera locations on a sketch or photo. Aim cameras 7-9 feet high, low enough to capture faces clearly, high enough to deter tampering.
Check camera viewing angles. Most security cameras have a 90-110° field of view: wide-angle models hit 130°+. Use painter’s tape or a cardboard mock-up to visualize coverage before drilling.
Plan your cable runs next. Trace the path from each camera back to the recorder location (often a basement, utility room, or closet). Avoid running cables parallel to electrical wiring for more than a few feet to prevent interference (NEC Article 800 recommends maintaining separation). If you must cross electrical lines, do so at a 90° angle.
Note any obstacles: insulation, ductwork, fire blocks in walls. For attic or crawl space runs, you’ll need a fish tape or pull string to route cable between wall cavities. If you’re drilling through exterior walls, plan the exit point to include a slight downward angle so water doesn’t track along the cable into the house.
Permit check: Some jurisdictions require permits for low-voltage wiring, especially if you’re opening walls. Check with your local building department before you start. Most exterior-mount-only installs don’t trigger permits, but verify.
Running Cables and Mounting Cameras
Start at the recorder end. Run cable to the first camera location, leaving 3-4 feet of slack at both ends for adjustments and terminations. Use cable staples or J-hooks in attics and basements to secure runs every 4-5 feet, keeping cable neat and preventing sags.
For exterior wall penetrations, drill a ⅝-inch hole (for a single Cat6 or RG59 run) using a long masonry bit if going through brick or concrete block, a standard spade bit for wood siding. Angle the hole slightly downward toward the outside. After feeding cable through, seal the penetration with silicone caulk or a cable grommet to block moisture and pests.
Mount cameras using the included brackets and stainless steel or coated screws to resist rust. For brick or stucco, use plastic anchors or toggle bolts rated for at least 20 lbs per camera (wind loading and vibration add dynamic forces). Aim the camera, tighten the bracket, and connect the cable.
Back at the recorder, terminate cables. For Ethernet, strip the jacket 1.5 inches, untwist pairs minimally, arrange wires per T568B standard (most common), insert into RJ45 connector, and crimp. Test continuity with a cable tester, cheap ones run $15-30 and catch wiring mistakes before you button everything up. For coaxial, strip, attach BNC connector, and crimp per the connector’s instructions.
Power up in stages: connect one camera, verify video signal on the monitor, then move to the next. This isolates problems quickly. Smart home product reviews emphasize testing each camera individually during installation rather than troubleshooting a full eight-camera system at once.
Safety note: Wear safety glasses when drilling overhead, and use a dust mask in attics with loose-fill insulation. If you’re working on a ladder outdoors, have a second person stabilize it or use a standoff to keep the ladder away from gutters.
Top Features to Look for When Buying a Wired System
When shopping for wired security camera systems, prioritize these features based on your use case:
Resolution: 1080p is the baseline for clear facial identification at 15-20 feet. 4K (8MP) cameras offer better detail for large yards or long driveways but require more storage and a compatible NVR. Don’t overbuy resolution for close-range applications, a 1080p camera at a doorway captures plenty of detail.
Night vision: Look for infrared LEDs with a range of at least 65-100 feet for outdoor cameras. Some models offer color night vision using ambient light or built-in spotlights, which helps identify vehicle colors or clothing details that IR washes out.
Weatherproofing: Outdoor cameras should carry an IP66 rating minimum (dust-tight, protected against heavy jets of water). IP67 adds brief submersion protection, useful for cameras mounted low near sprinkler zones. Check the operating temperature range if you’re in a region with extreme heat or cold, most quality units handle -4°F to 140°F.
Motion detection and alerts: Many recorders include motion-triggered recording to save storage space. Adjustable sensitivity zones let you ignore tree branches swaying in the wind while capturing actual movement. Higher-end systems add AI-based person/vehicle detection to cut false alarms, a feature highlighted in home automation reviews as a worthwhile upgrade.
Remote viewing: Nearly all modern wired security camera systems with remote viewing include mobile apps (iOS and Android). Confirm the app supports push notifications, live view, and playback. Some recorders also integrate with Alexa or Google Assistant for voice commands, though functionality is usually limited to viewing feeds on smart displays.
Expandability: If you start with a 4-channel system, verify you can upgrade to 8 or 16 channels later by swapping the DVR/NVR, using the same cameras and cables. This future-proofs your investment.
Storage and backup: Internal hard drives are standard, but look for systems that support USB or network backup for archiving critical footage. RAID configurations (mirrored drives) add redundancy in case a hard drive fails.
Audio: If two-way audio matters, say, for a front-door camera, confirm the camera has a built-in microphone and speaker, and that the recorder supports audio channels. Not all budget systems do.
Warranty and support: A 3-year warranty is common for quality recorders: cameras typically get 1-2 years. Check that firmware updates are available and that the manufacturer has responsive support. Fly-by-night brands often abandon products within a year, leaving you with an unsupported system.
Buying a complete kit (cameras, recorder, cables, power supply) simplifies compatibility and often costs less than piecing components together. Just verify the kit matches your camera count and resolution needs before committing.